The Singer Heavy Duty Stitch Guide helps users master various stitches for heavy-duty sewing. It provides detailed settings for optimal performance with different fabrics and projects.

Understanding the Singer Heavy Duty Stitch Guide
The Singer Heavy Duty Stitch Guide is a comprehensive resource for optimizing stitch selection and customization. It ensures precise control over stitch length and width for various fabrics and projects.

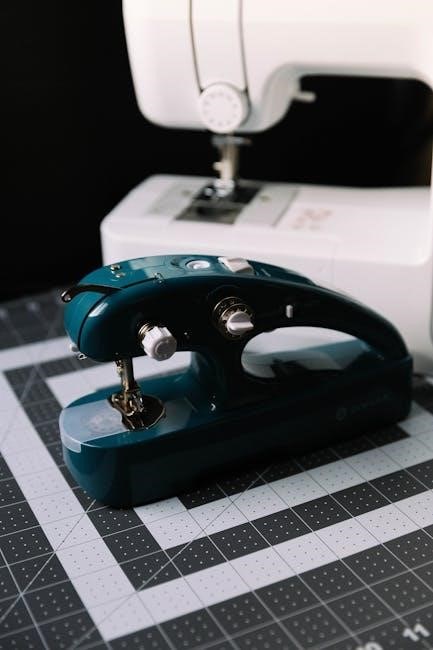
2.1. Overview of the Singer Heavy Duty Sewing Machine
The Singer Heavy Duty Sewing Machine is built for durability and power, featuring a high-performance motor 60% stronger than standard machines. Models like the 4432 and 4423 offer 23 built-in stitches, including straight, zigzag, and decorative options. With a maximum sewing speed of 1100 stitches per minute, it excels at handling heavy fabrics. The metal frame ensures stability, while customizable stitch length and width settings provide versatility. Designed for both professionals and hobbyists, it comes with essential presser feet and maintenance tips for optimal performance.
2.2. Importance of Using the Correct Stitches
Using the correct stitches ensures professional results and prevents fabric damage. For heavy fabrics, longer stitches are recommended, while lighter fabrics require shorter ones. Incorrect settings can lead to broken needles or uneven stitching. The Singer Heavy Duty Stitch Guide provides detailed diagrams to help users choose the right stitch for their project, ensuring durability and a polished finish. Proper stitch selection also enhances the machine’s performance, making it easier to handle various materials effectively.
Types of Stitches Available
The Singer Heavy Duty Stitch Guide offers a variety of stitches, including straight, zigzag, and decorative options. It also supports specialized stitching with the cording foot accessory.
3.1. Straight Stitch
The straight stitch is ideal for basic sewing tasks. It works well for thin fabrics and straight-line projects. Adjust the stitch length between 2 and 3 for optimal results. Use this stitch for seaming and repairing. It’s perfect for lightweight materials like cotton or silk. For heavier fabrics, a longer stitch length may be needed. Always test on scrap fabric before starting your project. This ensures the stitch settings are suitable for your material.
3.2. Zigzag Stitch
The zigzag stitch is perfect for finishing raw edges and preventing fraying on woven fabrics. It’s also ideal for sewing stretchy materials, as it allows for flexibility. Adjust the stitch width for heavier fabrics and narrow it for lighter ones. Use this stitch for decorative purposes or to reinforce seams. It’s versatile and easy to customize. Sew a test seam to ensure the settings are correct for your fabric type. This stitch is essential for both practical and creative projects.
3.3. Decorative Stitches
The Singer Heavy Duty Stitch Guide offers a variety of decorative stitches to enhance your sewing projects. These stitches add elegance and creativity to fabrics, perfect for embroidery, quilting, or embellishments. With options like floral patterns, geometric designs, and scallops, you can customize your projects. Adjust stitch length and width to suit your fabric type. Decorative stitches are ideal for adding personalized touches to clothing, home decor, or crafts. They allow for versatility and creativity, making your sewing unique and professional-looking. Explore these stitches to elevate your sewing skills and projects.
Customizing Your Stitches
Customizing stitches enhances sewing projects by adjusting length and width. This feature allows precise control, ensuring stitches suit fabric type and desired aesthetic, optimizing results.
4.1. Adjusting Stitch Length
Adjusting stitch length is crucial for achieving professional results. For straight stitching, set the length between 2-3. Thicker fabrics require longer stitches for strength, while delicate fabrics need shorter ones for precision. Use the stitch length dial to customize settings, ensuring seams are secure without being bulky. Always test on scrap fabric to confirm the ideal length for your project, ensuring optimal performance and fabric compatibility with each stitch.
4.2. Setting the Right Stitch Width
Setting the right stitch width ensures even fabric penetration and prevents distortion. Use the stitch width dial to adjust settings, with narrower widths for lightweight fabrics and wider for heavier materials. Proper width prevents fabric from bunching or stretching, ensuring smooth stitching. Always test on scrap fabric to confirm the ideal width, guaranteeing professional-looking seams and optimal fabric handling;

Presser Feet and Their Functions
Presser feet are essential for guiding fabric and enhancing stitching precision. They come in various types to accommodate different fabrics and stitching techniques, ensuring optimal sewing results.
5.1. General Purpose Foot
The General Purpose Foot is a versatile attachment for everyday sewing. It is designed to handle a variety of fabrics, from lightweight cotton to medium-weight materials. Its flat sole provides stability, ensuring even feeding of fabric and consistent stitch formation; This foot is ideal for straight stitching and general sewing tasks, making it a must-have for any sewer. Its simplicity and reliability make it the go-to choice for many projects, ensuring professional-looking results every time.
5.2. Zipper Foot
The Zipper Foot is a specialized accessory designed for sewing zippers, piping, and thick fabrics. Its narrow, curved shape allows for precise control when working with bulky materials. The foot features a guide on the underside to align with the fabric edge, ensuring straight stitching. It is ideal for attaching zippers smoothly and evenly. The Zipper Foot is a must-have for projects requiring heavy-duty seams, such as bags, jackets, and home decor items. Its unique design ensures professional-looking results even on challenging fabrics.
5.3. Cording Foot
The Cording Foot is an optional accessory for Singer Heavy Duty machines, designed to guide thin yarns or cords while stitching. Its grooves on top help in creating decorative stitching or functional reinforcement. This foot is perfect for embellishing fabrics with intricate designs or adding strength to seams. It ensures precise alignment, making it ideal for projects like embroidery, quilting, or heavy-duty repairs. The Cording Foot enhances creativity and durability in sewing, offering professional results for various applications.
Advanced Features of the Singer Heavy Duty
The Singer Heavy Duty features a powerful motor, 60% stronger than standard machines, and a robust metal frame. It sews up to 1100 stitches per minute, ensuring efficiency and durability.
6.1. High-Speed Stitching
The Singer Heavy Duty sewing machine delivers high-speed stitching, capable of sewing up to 1100 stitches per minute. This feature is ideal for heavy-duty projects, such as thick fabrics or large-scale creations. The high-speed capability ensures efficiency without compromising stitch quality, making it perfect for both professionals and home sewists. With this advanced feature, users can complete tasks quickly while maintaining precise and consistent results across various materials, from lightweight fabrics to heavy-duty textiles.
6.2. Heavy-Duty Motor and Frame
The Singer Heavy Duty sewing machine features a robust motor and metal frame, designed for durability and stability. The motor is 60% stronger than standard machines, enabling it to handle thick fabrics effortlessly. Its heavy-duty construction minimizes vibrations, ensuring smooth operation even at high speeds. This powerful combination makes it ideal for demanding projects, providing consistent performance and long-lasting reliability for sewists tackling heavy-duty tasks.
Maintenance Tips for Optimal Performance
Regular cleaning of the machine, lubricating moving parts, and checking the needle plate and presser foot for damage are essential for maintaining optimal performance.
7.1. Cleaning the Machine
Regular cleaning is essential for maintaining the Singer Heavy Duty sewing machine. Use a small, dry brush to remove lint and debris from the bobbin area, feed dogs, and stitch plate. A lint brush or vacuum cleaner can also help access tight spaces. Clean after each project to prevent fabric residue buildup. For stubborn lint, a cotton swab lightly dampened with water can be used, but avoid liquids near electrical components; Proper cleaning ensures smooth operation and prevents damage to internal parts.
7.2. Lubricating Moving Parts
Regular lubrication of the Singer Heavy Duty sewing machine’s moving parts ensures smooth operation and extends its lifespan. Use a few drops of high-quality sewing machine oil on the bobbin hook and feed dog area. Apply oil after cleaning or every 50 hours of use. Gently run the machine without fabric to spread the oil evenly. Avoid over-lubricating, as excess oil can attract lint. Proper lubrication prevents friction and keeps the machine running efficiently, ensuring consistent stitch quality and reducing the risk of mechanical issues over time.
Troubleshooting Common Issues
Identify and resolve common problems like broken needles or uneven stitches by checking thread tension, needle alignment, and fabric guidance. Regular maintenance often prevents these issues.
8.1. Broken Needles
Broken needles are often caused by incorrect thread tension, misaligned fabric, or using the wrong needle type. To fix this, check the thread path, ensure fabric is guided properly, and use the appropriate needle for the fabric thickness. Regularly inspect and replace dull needles, as they are more prone to breaking. Always turn off the machine before handling needles to avoid accidents. Proper maintenance and correct setup can significantly reduce the likelihood of needle breakage during sewing.
8.2. Uneven Stitches
Uneven stitches can occur due to incorrect stitch length or width settings, improper fabric alignment, or using the wrong presser foot. To fix this, adjust the stitch settings according to fabric thickness and ensure the presser foot is appropriate for the task. Check thread tension and ensure it’s balanced. Using the correct needle type for your fabric can also prevent uneven stitching. Always test stitches on scrap fabric before starting your project to ensure consistency and avoid issues. Proper adjustments and maintenance will help achieve smooth, even stitches every time.
The Singer Heavy Duty Stitch Guide is an essential resource for mastering your sewing machine. By understanding stitch customization, presser feet functions, and maintenance tips, you can unlock the machine’s full potential. Whether sewing heavy fabrics or delicate materials, this guide provides the insights needed for professional results. Regular troubleshooting and maintenance ensure smooth operation. With its robust features and versatility, the Singer Heavy Duty sewing machine is a reliable companion for both beginners and experienced sewists, helping you create flawless projects every time.