
Welcome to the Aprilaire 700 Installation Manual, your comprehensive guide to installing and configuring the Aprilaire 700 whole-home humidifier. This manual provides detailed instructions to ensure proper installation, safety, and optimal performance. It covers key features, step-by-step processes, and essential maintenance tips to keep your system running efficiently.
1.1 Overview of the Aprilaire 700 Humidifier
The Aprilaire 700 is a high-efficiency whole-house humidifier designed to provide consistent humidity levels throughout your home. It is engineered to work seamlessly with your HVAC system, ensuring optimal comfort and indoor air quality. This model features a built-in fan that circulates humidified air directly into your ductwork, eliminating the need for bypass ductwork in most installations. The Aprilaire 700 is known for its reliability, quiet operation, and ability to humidify homes up to 4,200 square feet. It also includes a humidistat for precise control over humidity levels, ensuring your home remains comfortable without over-humidification. This system is ideal for homeowners seeking a balanced and efficient solution to dry indoor air.
1.2 Importance of Proper Installation
Proper installation of the Aprilaire 700 is critical to ensure optimal performance, safety, and longevity of the system. Incorrect installation can lead to inefficiency, damage to the unit, or even safety hazards. A well-installed humidifier ensures balanced humidity levels, prevents over-humidification, and avoids issues like mold growth or water damage. It also guarantees compatibility with your HVAC system, ensuring seamless operation during heating and cooling cycles. Following the manufacturer’s guidelines helps maintain warranty validity and prevents premature wear and tear. Improper installation can result in higher energy bills, reduced indoor air quality, and potential system failure. Always adhere to the installation manual to ensure your Aprilaire 700 operates effectively and safely, providing consistent comfort and improved air quality in your home.
1.3 Key Features of the Aprilaire 700 Model
The Aprilaire 700 stands out for its advanced features designed to enhance indoor air quality and user convenience. It incorporates a built-in humidistat for precise moisture control, ensuring optimal humidity levels are maintained. The unit is compatible with both conventional and variable-speed HVAC systems, offering flexibility for different home setups. Its fan-powered design ensures efficient humidity distribution throughout the home, while the evaporative technology minimizes energy consumption; The model also features a high-capacity water panel for extended operation between replacements. Additionally, it supports integration with smart home systems, like Ecobee thermostats, for advanced control. These features collectively ensure reliable performance, energy efficiency, and seamless integration into modern home comfort systems, making the Aprilaire 700 a top choice for whole-house humidification.

Pre-Installation Requirements and Preparation
Before installing the Aprilaire 700, ensure you have the necessary tools, materials, and knowledge. Review the manual, prepare the site, and follow safety guidelines for a smooth process.
2.1 Understanding the Installation Manual
The Aprilaire 700 Installation Manual is a comprehensive guide designed to walk you through the entire installation process. It includes detailed instructions, diagrams, and safety precautions to ensure a successful setup. The manual covers everything from pre-installation checks to final configuration, providing clear step-by-step directions. Understanding the manual is crucial to avoid errors and ensure the humidifier operates efficiently. Familiarize yourself with the contents, including safety guidelines, tool requirements, and troubleshooting tips. Reading the manual carefully before starting will help you identify potential issues and prepare adequately. Refer back to it during installation to confirm each step and ensure compliance with manufacturer recommendations.
2.2 Tools and Materials Needed
Before starting the installation, gather all necessary tools and materials to ensure a smooth process. Essential tools include a screwdriver set, pliers, wire nuts, a drill with bits, and a tape measure. You may also need a wrench for water supply connections. Materials required include copper tubing, water supply lines, and drainage components. Ensure you have the Aprilaire 700 unit, the humidistat, and any additional accessories provided in the installation kit. Refer to the manual for a detailed list to confirm you have everything needed. Having all tools and materials ready will help streamline the installation process and prevent delays. Double-check the manual for specific requirements to avoid missing any critical items.
2.3 Safety Precautions Before Starting
Before beginning the installation of the Aprilaire 700, ensure all safety precautions are taken to avoid potential hazards; First, turn off the power to the HVAC system at the circuit breaker to prevent electrical shocks or injuries. Verify the system is completely powered down using a voltage tester. Wear protective gear, such as safety glasses and gloves, to safeguard against sharp edges or accidental cuts. Ensure the work area is clear of clutter and well-ventilated. Handle electrical components with care, avoiding improper connections that could lead to short circuits. When working with water lines, check for leaks immediately after installation to prevent water damage. Always follow the manufacturer’s guidelines and local safety codes. Proper preparation and adherence to these precautions will ensure a safe and successful installation process.
2.4 Choosing the Right Location for Installation
Selecting the right location for your Aprilaire 700 humidifier is crucial for optimal performance and efficiency. The unit should be installed on the supply plenum or return plenum, depending on your HVAC system configuration. Ensure the location allows for proper drainage, as the humidifier produces condensate during operation. Install the unit near a drain or consider using a condensate pump if a gravity-fed drain isn’t available. Choose a spot that provides easy access for future maintenance and servicing. The location should also be protected from extreme temperatures and direct sunlight to prevent overheating or freezing issues. Additionally, ensure there is adequate clearance around the unit for proper airflow and electrical connections. Avoid installing the humidifier in areas with high humidity or near gas-fired appliances to maintain safety and efficiency.

Step-by-Step Installation Process
This section provides a detailed guide through unpacking, connecting to HVAC, installing humidistat, mounting, water supply setup, drainage, and final system checks for optimal performance.
3.1 Unpacking and Inspecting the Aprilaire 700
Begin by carefully unpacking the Aprilaire 700 humidifier from its box, ensuring all components are included and undamaged. Check for the humidifier unit, humidistat, mounting hardware, and water panel. Inspect for any signs of shipping damage, such as dents or cracks, and verify the integrity of the packaging seals. If any parts are missing or damaged, contact Aprilaire customer support immediately. Familiarize yourself with the included accessories and documentation, such as the installation manual and warranty information. Before proceeding, ensure all items are accounted for and in good condition to avoid installation delays. This step ensures a smooth start to the installation process.
3.2 Connecting the Humidifier to the HVAC System
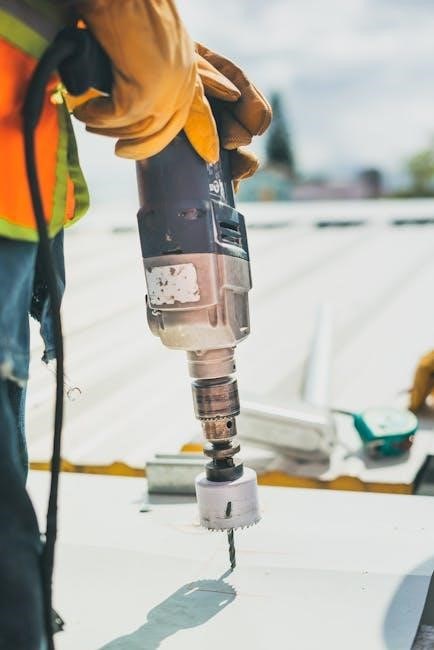
To connect the Aprilaire 700 to your HVAC system, locate the supply plenum and identify a suitable location for installation. Ensure the area is clear of obstructions and within reach of necessary wiring and water supply lines. Use the provided mounting hardware to secure the humidifier to the plenum, aligning it with the 6-inch diameter port for proper airflow. Once mounted, connect the humidifier’s ductwork adapter to the plenum, ensuring a tight seal to prevent air leaks. Turn off your HVAC system before making any connections to avoid damage or injury. Finally, verify that the humidifier is properly aligned and securely fastened to the HVAC system for efficient operation. This step is critical for integrating the humidifier into your home’s heating system.
3.3 Installing the Humidistat and Wiring
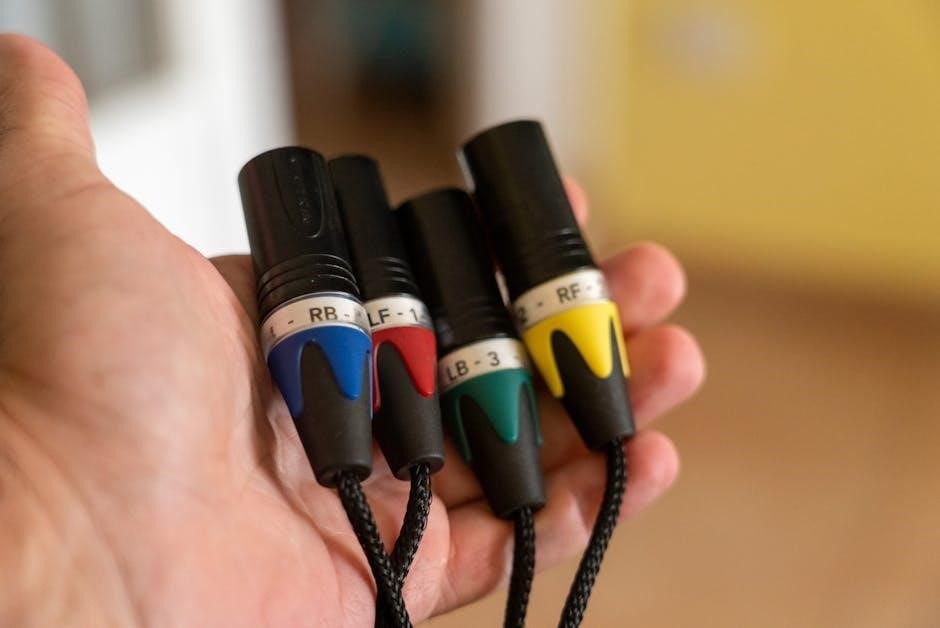
Begin by mounting the humidistat on the furnace or a nearby wall, ensuring it’s within the recommended temperature range for accurate readings. Connect the humidistat wires to the Aprilaire 700, following the wiring diagram in the manual. Typically, the humidistat controls the humidifier’s operation based on the set humidity level. Next, connect the 24V transformer to the humidistat and ensure all wiring is securely fastened to avoid loose connections. Refer to the manufacturer’s instructions for specific wire color coding and connections. Finally, test the wiring by turning on the HVAC system and verifying that the humidifier activates when the humidistat calls for humidity. Proper wiring ensures seamless communication between components for efficient operation. Always double-check connections to prevent malfunctions or safety hazards.
3.4 Mounting the Unit on the Supply Plenum
Mount the Aprilaire 700 humidifier on the supply plenum, ensuring it is level and securely fastened; Choose a location that allows proper airflow and easy access for future maintenance. Use the provided hardware to attach the unit, ensuring it is tightly fastened to prevent vibration. The humidifier can be installed on either the supply or return plenum, depending on your system setup. Drill pilot holes if necessary to avoid damaging the plenum. Once mounted, connect the humidifier to the ductwork, ensuring a tight seal to maintain efficiency. Double-check that the unit is level and securely fastened to prevent any movement during operation. Proper mounting ensures safe and efficient operation of the humidifier.
3.5 Connecting the Water Supply Line
Connect the water supply line to the Aprilaire 700 humidifier by locating a nearby water source, such as a water pipe or shut-off valve. Turn off the main water supply before making any connections to ensure safety. Use a saddle valve or a dedicated water supply line kit to tap into the water line. Attach the supply line to the humidifier’s water inlet, ensuring a secure, watertight connection. Avoid over-tightening to prevent damage to the valve or line. Once connected, slowly turn the water supply back on and check for leaks around the connections. Proper water supply ensures consistent humidification performance. Always follow local plumbing codes and safety guidelines during this process.
3;6 Ensuring Proper Drainage Setup
Proper drainage is essential to prevent water damage and maintain efficient operation of the Aprilaire 700 humidifier. Start by installing a drain pan under the unit to catch any excess water. Connect the drainage line to the humidifier’s drain outlet, ensuring it is securely attached. Route the drainage line to a nearby floor drain or utility sink, avoiding any kinks or blockages. Use a check valve if required to prevent backflow. Test the drainage system by running water through it to ensure proper flow and check for leaks. If installing on a concrete slab, consider elevating the unit slightly to facilitate drainage. Always follow local plumbing codes and guidelines for safe installation. Proper drainage setup ensures long-term performance and prevents potential water damage.
Post-Installation Setup and Configuration
After installation, configure the Aprilaire 700 by setting the humidistat to your desired humidity level. Test the system to ensure proper operation and adjust the water flow rate as needed. Integrate with smart thermostats for advanced control and energy efficiency. Regularly monitor performance to maintain optimal indoor air quality.
4.1 Configuring the Humidistat Settings
The humidistat is a critical component of the Aprilaire 700, controlling the humidity levels in your home. To configure it, set the desired relative humidity level between 30-50%, depending on your comfort preferences. Ensure the humidistat is mounted in an area representative of your home’s average humidity. Test the system by raising the setpoint to activate the humidifier and observe if it correctly adds moisture. Adjust the sensitivity if needed to prevent over-humidification. For optimal performance, integrate the humidistat with your HVAC system and consider pairing it with a smart thermostat for automated control. Regularly monitor and adjust settings to maintain balanced indoor humidity levels year-round.
4.2 Testing the Humidifier Operation
After installation, thoroughly test the Aprilaire 700 to ensure proper operation. Begin by setting the humidistat to the desired humidity level and turning on the HVAC system. Check if the humidifier activates when the system calls for heat. Verify water flow through the unit and ensure the fan operates correctly. Test the humidistat’s response by raising and lowering the setpoint to observe if the humidifier cycles on and off appropriately. Use a hygrometer to confirm humidity levels are within the set range. Inspect for leaks in the water supply line and drainage system. If the humidifier does not activate, consult the troubleshooting section or the installation manual. Run the system for 30 minutes to ensure consistent operation and adjust settings as needed for optimal performance.
4.3 Adjusting the Water Flow Rate
Adjusting the water flow rate on your Aprilaire 700 is crucial for maintaining optimal humidity levels. Locate the water flow control valve, typically found near the water supply line. To increase water flow, turn the valve counterclockwise; to decrease it, turn it clockwise. Monitor the humidity levels using a hygrometer to ensure they remain between 30-50%. Adjust the valve as needed to achieve the desired comfort level. Consider factors like home size, current humidity, and outdoor temperature when setting the flow rate. Refer to the manual for specific guidelines or charts that recommend optimal flow rates based on these factors. Regular maintenance, such as cleaning or replacing the water panel, may be necessary to ensure unrestricted water flow and efficient operation.
4.4 Integrating with Smart Thermostats (e.g., Ecobee)
Integrating the Aprilaire 700 with smart thermostats like Ecobee enhances your home’s climate control by synchronizing humidity and temperature management. Start by connecting the Aprilaire 700’s humidistat to the smart thermostat’s accessory terminal, ensuring proper wiring according to the manual. Use a 24V transformer if required. Once connected, configure the smart thermostat to recognize the humidifier. This integration allows the thermostat to automatically control humidity levels based on the current temperature and desired settings. Adjust the configuration in the thermostat’s menu to optimize performance, such as setting humidity levels or enabling auto-mode. This seamless integration improves energy efficiency and ensures consistent indoor air quality. Refer to both the Aprilaire 700 and smart thermostat manuals for detailed instructions on compatibility and setup.
Maintenance and Troubleshooting
Regular maintenance ensures optimal performance of the Aprilaire 700. Clean the evaporator pad and check the water panel for mineral buildup. Troubleshoot issues like improper humidity levels or water leaks by consulting the manual or contacting customer support for assistance. Addressing problems promptly prevents system damage and ensures efficient operation.
5.1 Routine Maintenance Tasks
Routine maintenance is essential to ensure the Aprilaire 700 operates efficiently and effectively. Start by cleaning or replacing the water panel and evaporator pad as recommended in the manual. Check and clean the humidistat to ensure accurate humidity readings. Inspect the drain system to prevent clogs and mineral buildup. Additionally, examine the water supply line for leaks or damage. Regularly vacuum the unit to remove dust and debris. For areas with hard water, consider replacing the water panel more frequently to avoid mineral scaling. Always refer to the manual for specific guidance on maintenance schedules and procedures to keep your system running smoothly and prolong its lifespan. Proper upkeep prevents issues and ensures optimal humidity levels in your home.
5.2 Cleaning the Evaporator Pad
Cleaning the evaporator pad is a crucial maintenance task for the Aprilaire 700 humidifier. Start by turning off the power to the unit and water supply. Remove the evaporator pad and soak it in a mixture of water and vinegar or a mild detergent to dissolve mineral buildup. Use a soft brush to gently scrub away any stubborn deposits. Rinse thoroughly with clean water to remove all cleaning solution and debris. Allow the pad to air dry completely before reinstalling it to prevent mold growth. Repeat this process every 1-3 months, depending on usage and water hardness. Regular cleaning ensures efficient moisture evaporation and maintains indoor air quality. Always refer to the manual for specific cleaning recommendations to keep your system performing at its best.
5.3 Troubleshooting Common Issues
Troubleshooting the Aprilaire 700 involves identifying and addressing common issues promptly. If the humidifier isn’t producing mist, check the water supply line for blockages or kinks. Ensure the humidistat is set correctly and the bypass damper is fully open. Water leaks may indicate a faulty float valve or improper drain setup. Insufficient humidity levels could result from incorrect humidistat settings or a clogged evaporator pad. Excessive moisture on windows suggests over-humidification, requiring adjustment of the humidistat. Regularly inspect and clean the evaporator pad to prevent mineral buildup. Refer to the manual for detailed diagnostic steps and solutions. Addressing these issues ensures optimal performance and prevents damage to the system or your home.
5.4 Replacing Parts (e.g., Water Panel, Sensor)
Replacing parts like the water panel and sensor on your Aprilaire 700 is essential for maintaining optimal performance. Start by turning off the power to the unit for safety. To replace the water panel, remove the screws or clips holding it in place, take out the old panel, and install the new one. Ensure it’s securely fastened to avoid leaks. For the sensor, disconnect the wiring carefully and replace it with the new sensor, making sure all connections are secure. After replacement, restore power and test the system to ensure proper function. Regularly replacing these parts prevents issues like reduced humidity output or inaccurate readings. Always use genuine Aprilaire parts for compatibility and reliability.
Advanced Features and Customization
The Aprilaire 700 offers advanced customization options, including adjustable humidity levels and compatibility with smart thermostats like Ecobee. These features enhance performance and energy efficiency, ensuring ideal indoor air quality year-round.
6.1 Using the Aprilaire 700 with Variable Speed Furnaces
The Aprilaire 700 humidifier is compatible with variable speed furnaces, ensuring precise humidity control and energy efficiency. Variable speed furnaces adjust their output to maintain consistent temperatures, and the Aprilaire 700’s humidistat works in tandem to regulate moisture levels seamlessly. This integration optimizes indoor air quality and prevents over-humidification or dryness. To maximize performance, ensure the humidistat is properly configured to match the furnace’s operation. Additionally, the humidifier’s fan-powered design allows it to operate independently or alongside the furnace, making it versatile for various HVAC systems. Always refer to the furnace manufacturer’s guidelines for specific compatibility requirements and settings to achieve the best results. Proper setup ensures enhanced comfort and system efficiency year-round.
6.2 Customizing Humidity Levels for Different Seasons
Customizing humidity levels for different seasons ensures optimal comfort and prevents moisture-related issues. During winter, aim for a relative humidity of 30-50% to combat dry air and maintain warmth. In summer, lower the humidity to 30-40% to avoid over-humidification and condensation. Adjust the humidistat settings based on outdoor temperatures and indoor comfort preferences. For precise control, use the Aprilaire 700’s built-in humidistat or integrate it with a smart thermostat. Regularly monitor humidity levels using a hygrometer to ensure balanced indoor air quality. Seasonal adjustments not only enhance comfort but also protect your home from structural damage caused by excessive moisture or dryness. Refer to the manual for detailed guidance on setting up seasonal humidity profiles tailored to your climate zone. Proper customization ensures year-round comfort and energy efficiency. Always maintain humidity levels within the recommended range for optimal performance.
6.3 Integrating with Home Automation Systems
Integrating the Aprilaire 700 with home automation systems enhances convenience and energy efficiency. Compatible with smart thermostats like Ecobee, this humidifier can be controlled remotely via apps or voice commands through platforms like Alexa. By linking the system to your smart home hub, you can synchronize humidity levels with temperature settings for optimal comfort. Automation allows the humidifier to respond dynamically to changes in indoor conditions, ensuring consistent air quality. For seamless integration, follow the manual’s guidelines for wiring and software setup. This feature is particularly useful for maintaining balanced humidity year-round without manual adjustments. Ensure a stable internet connection for reliable operation and enjoy the benefits of a smart, connected home. Proper integration enhances both comfort and energy efficiency, making it a valuable upgrade for modern homes.
Compliance and Warranty Information
Ensure the Aprilaire 700 installation meets local building codes and safety standards. Review the warranty terms for coverage details and register your unit for validation. Compliance ensures safe operation.
7.1 Compliance with Local Building Codes
Installing the Aprilaire 700 requires adherence to local building codes and regulations to ensure safety and proper operation. Verify that all electrical connections meet regional standards. Conduct a thorough review of local HVAC and plumbing codes before proceeding. Compliance with these regulations guarantees a safe and efficient installation. Always consult local authorities if unsure about specific requirements. Proper compliance prevents potential hazards and ensures the system operates within legal guidelines. Non-compliance could lead to legal issues or system malfunctions. Ensure all permits are obtained, and inspections are scheduled as needed. Compliance is crucial for a successful and lawful installation.
7.2 Understanding the Warranty Terms
Understanding the warranty terms for your Aprilaire 700 is essential to ensure coverage and protection for your investment. The warranty typically covers parts and labor for a specified period, provided the installation meets manufacturer guidelines. Review the warranty document to identify covered components and any conditions that may void the agreement. Key aspects to verify include the duration of coverage, requirements for registration, and any exclusions. Proper installation and maintenance, as outlined in the manual, are often prerequisites for warranty validity. Keep records of installation and maintenance for potential warranty claims. If issues arise, contact authorized dealers or the manufacturer for assistance. Familiarizing yourself with the warranty terms ensures you understand your rights and responsibilities. Always review the warranty section in the manual for detailed information.
7.3 Registering Your Aprilaire 700 Humidifier
Registering your Aprilaire 700 humidifier is a straightforward process that ensures warranty validation and access to exclusive support services. Visit the official Aprilaire website and navigate to the product registration section. Create an account or log in if you already have one. Enter the required details, including your contact information, installation date, and product serial number, which can be found on the unit or in the manual. Ensure all information is accurate to avoid delays. Once registered, you’ll receive confirmation and be eligible for warranty coverage, as well as priority customer support. Registration also grants access to updates, promotions, and maintenance reminders. This step is crucial for maximizing your humidifier’s performance and protecting your investment. Complete the registration promptly after installation to enjoy these benefits without interruption.
After completing the installation, verify all components function correctly, ensure energy efficiency, and schedule routine maintenance to maintain optimal performance and extend the humidifier’s lifespan.
8.1 Verifying Proper Functionality
After completing the installation, ensure the Aprilaire 700 operates correctly by checking all connections, settings, and components. Verify that the humidistat is properly configured and that water flows through the system when the HVAC system is active. Test the unit under normal operating conditions to confirm it humidifies the air effectively. Check the humidity levels with a hygrometer to ensure they align with your settings. Additionally, inspect the drainage system to ensure it functions without leaks or blockages. Finally, review all steps to confirm that the installation aligns with the manual’s guidelines for optimal performance and efficiency.
8.2 Ensuring Energy Efficiency
To ensure the Aprilaire 700 operates efficiently, adjust the humidistat settings to maintain optimal humidity levels without overhumidifying. Proper installation and alignment with your HVAC system are crucial for energy savings. Regularly inspect and clean the evaporator pad to prevent buildup and maintain airflow. Consider integrating the humidifier with a smart thermostat to automatically regulate humidity based on your home’s conditions. By following these steps, you can minimize energy consumption while maintaining indoor air quality and comfort. Proper maintenance and configuration will help the system run efficiently, reducing energy waste and prolonging its lifespan.
8.3 Scheduling Future Maintenance
Regular maintenance is essential to ensure the Aprilaire 700 continues to perform efficiently. Schedule annual professional inspections to check for wear and tear, especially on critical components like the water panel and evaporator pad. Additionally, plan monthly checks to clean or replace filters and inspect the humidistat for accuracy. Ensure proper drainage by checking the condensate line regularly to prevent blockages. Replace the water panel every 6 to 12 months, depending on usage and water quality. By maintaining a consistent maintenance schedule, you can prevent issues like mold growth and ensure the system operates at peak performance. This proactive approach will also help extend the lifespan of your Aprilaire 700 and maintain optimal indoor air quality year-round.