The Aprilaire 600 humidifier is a popular whole-house solution for maintaining optimal indoor humidity levels. Proper installation ensures efficient operation, improved air quality, and system longevity.
Overview of the Aprilaire 600 Humidifier
The Aprilaire 600 is a whole-house humidifier designed to provide efficient and consistent humidity control for homes. It replaces older models like the 560 and 568, offering improved performance and reliability. This unit is known for its compact design and reversible installation, allowing it to be mounted on either the supply or return plenum of a forced-air system. The Aprilaire 600 is designed to work seamlessly with existing HVAC systems, ensuring optimal indoor air quality. It features a manual humidifier control for precise settings and is compatible with various installation configurations. With its robust construction and user-friendly design, the Aprilaire 600 is a popular choice for homeowners seeking reliable humidity management.
Importance of Proper Installation
Proper installation of the Aprilaire 600 humidifier is crucial for ensuring optimal performance, efficiency, and safety. Incorrect installation can lead to reduced system efficiency, higher energy bills, and potential damage to the unit or HVAC system. It can also result in inadequate humidity control, leading to discomfort and indoor air quality issues. Furthermore, improper installation may void the manufacturer’s warranty, leaving you without support in case of malfunctions. Ensuring all steps are followed correctly guarantees reliable operation, extends the lifespan of the humidifier, and maintains a healthy indoor environment. Always refer to the official installation manual and consider professional assistance if unsure about any step to avoid complications and ensure long-term benefits.
Pre-Installation Checklist
Before installing the Aprilaire 600 humidifier, ensure you have a clear plan and all necessary items ready. Start by selecting a suitable installation location, preferably near the HVAC system for easy connectivity. Turn off the power to the HVAC system to ensure safety during installation. Gather all components included in the humidifier kit, such as the unit, water panel, and control. Verify that you have additional tools like a drill, screwdrivers, and water supply lines; Review the installation manual thoroughly to understand each step. Check local plumbing and electrical codes to ensure compliance. If unsure about any part of the process, consider consulting a professional to avoid errors. Proper preparation ensures a smooth and successful installation process.

System Components and Tools Needed

The Aprilaire 600 humidifier includes the main unit, water panel, and control. Additional tools like a drill, screwdrivers, and water supply lines are required for installation.

Components Included in the Aprilaire 600 Humidifier
The Aprilaire 600 humidifier comes with essential components for seamless operation. These include the humidifier unit, water panel, humidistat control, and installation hardware. The humidifier unit houses the core mechanism for adding moisture to the air. The water panel is designed to evaporate water efficiently, ensuring proper humidity levels. The humidistat control regulates moisture based on set parameters. Installation hardware, such as mounting screws and brackets, facilitates secure setup. These components work together to provide a reliable whole-house humidification solution. Proper assembly and installation of these parts are crucial for optimal performance and longevity of the system.
Additional Tools Required for Installation
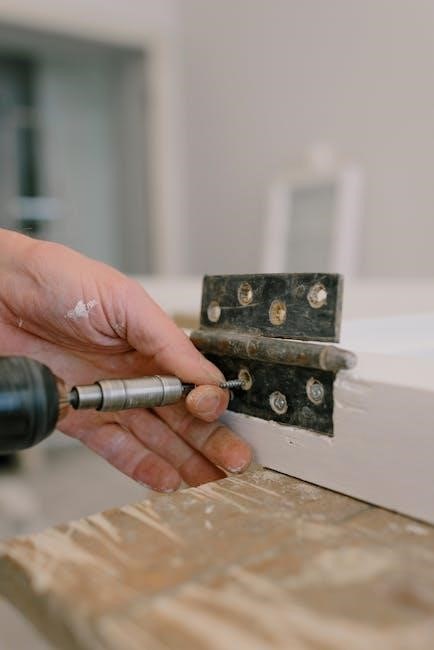
Beyond the components provided, several tools are necessary for installing the Aprilaire 600 humidifier. A drill with bits is needed for creating holes in the ductwork or walls. Adjustable wrenches and screwdrivers are essential for securing connections and assembling parts. Pliers may be required for bending or shaping wires. A wire stripper is useful for preparing electrical connections; Measuring tape ensures accurate placement, while a level guarantees proper alignment. Additionally, PVC pipe, fittings, and a water supply line are needed for plumbing. A voltage tester is recommended for verifying electrical connections. Lastly, sealants like duct tape or mastic may be necessary to ensure airtight seals. Having these tools on hand simplifies the installation process and ensures a professional finish.

Pre-Installation Steps
Plan the setup, assess HVAC compatibility, and evaluate water supply. Ensure electrical requirements are met and prepare the area for safe, efficient installation.
Choosing the Installation Location
When selecting a location for the Aprilaire 600 humidifier, consider its compatibility with your HVAC system. It can be installed on either the supply or return plenum. Ensure the area is dry, well-ventilated, and protected from freezing temperatures. Avoid direct sunlight or moisture-prone spaces. The ideal spot is near the HVAC system for efficient operation and easy maintenance. Ensure the location allows proper drainage and access to a water supply. Mounting the unit in a centralized location ensures even humidity distribution. Always follow the manufacturer’s guidelines to avoid installation errors and warranty issues. Proper placement is crucial for optimal performance and longevity of the humidifier.
Preparing the Installation Site
Before installing the Aprilaire 600 humidifier, ensure the installation site is properly prepared. Clear the area of debris and obstructions to allow easy access and movement. Verify that the site is level and dry to prevent water damage or uneven installation. Check for proper drainage options, as the humidifier requires a drain connection. Ensure proximity to a water supply line and electrical power source. Protect the area from freezing temperatures, as this can damage the unit. Cover the floor or surrounding surfaces to prevent water damage during installation. Refer to the manual for specific site preparation requirements to ensure compliance with safety and performance standards. Proper preparation ensures a smooth and successful installation process.
Turning Off Power to the HVAC System
Before starting the installation, ensure the HVAC system is completely powered off for safety. Locate the circuit breaker or switch that controls the HVAC system and turn it off. Verify that the system has stopped running entirely. This step is crucial to prevent electrical shocks or injuries during the installation process. Once the power is off, notify all household members to avoid accidental startup. Keep the power off until the installation is complete and you are ready to test the system. Properly disconnecting the power ensures a safe working environment and prevents damage to the Aprilaire 600 humidifier or existing HVAC components. Always follow safety guidelines to protect yourself and the equipment during installation.

Installation Process
The installation process involves mounting the unit, connecting the water supply, installing drainage, handling electrical connections, and setting up the control for smooth operation.
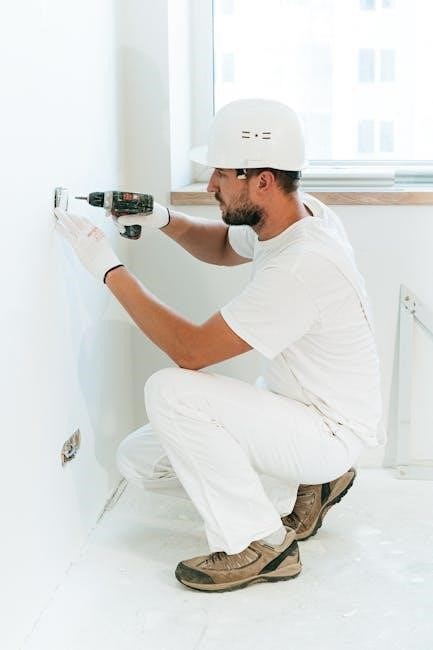
Step 1: Mounting the Humidifier Unit
Mounting the Aprilaire 600 humidifier unit is the first step in the installation process. Begin by selecting a suitable location, ensuring it is level, stable, and accessible for future maintenance. Use the provided mounting hardware to secure the unit to the wall or floor, following the manufacturer’s guidelines. Make sure the unit is positioned correctly to allow proper airflow and drainage. If installing on a furnace, align the humidifier with the furnace’s ductwork for efficient integration. Double-check all fastenings to ensure stability and prevent any movement during operation. Proper mounting is essential for the system’s performance and longevity. Always refer to the installation manual for specific details.
Step 2: Connecting the Water Supply
Connecting the water supply to the Aprilaire 600 humidifier is a critical step. Start by turning off the main water supply to the house. Locate a nearby water line and install the provided saddle valve, ensuring it is securely tightened. Attach the humidifier’s water supply tubing to the saddle valve and route it to the humidifier unit. Tighten all connections firmly to prevent leaks. Next, connect the other end of the tubing to the humidifier’s water inlet port, following the manufacturer’s instructions. Double-check all connections for proper sealing and turn the water supply back on slowly to test for leaks. Ensure the drain line is also properly connected to allow excess water to flow freely. Proper water supply connection is essential for the humidifier’s operation and efficiency.
Step 3: Installing the Drainage System
Installing the drainage system for the Aprilaire 600 humidifier is essential for managing excess water. Begin by locating a suitable drainage point, such as a floor drain or condensate pump. Attach the drainage tubing to the humidifier’s drainage port, ensuring a secure connection. Route the tubing to the chosen drainage location, avoiding kinks or loops that could obstruct water flow. If using a condensate pump, ensure it is properly installed and operational. Finally, test the system by running the humidifier to confirm water flows freely through the drainage system without leaks or blockages. Proper drainage installation prevents water accumulation and ensures efficient operation.
Step 4: Connecting the Electrical Components
Connecting the electrical components for the Aprilaire 600 humidifier requires careful attention to ensure safe and proper operation. Begin by turning off the power to the HVAC system at the circuit breaker. Locate the electrical connections on the humidifier and the furnace. Refer to the wiring diagram provided in the installation manual to identify the correct wires for power, sensors, and controls. Connect the humidistat or control panel to the furnace’s electrical system, ensuring all wires are securely attached. If using a separate transformer, install it according to the manufacturer’s instructions. Finally, restore power and test the electrical connections by running the humidifier to ensure all components function correctly. Proper electrical connections are critical for safe and efficient operation.
Step 5: Installing the Humidifier Control
Installing the humidifier control is a crucial step for regulating moisture levels. Mount the control panel in a convenient location, such as the return duct, using the provided screws. Ensure the control is level and securely fastened. Refer to the wiring diagram to connect the control to the humidifier and furnace. Connect the sensor wires to monitor humidity levels accurately. If using a manual control, set it to the desired humidity level; For automated systems, ensure the control is linked to your HVAC system. Finally, test the control by running the humidifier to verify proper operation. Correct installation ensures precise humidity regulation and seamless integration with your home’s HVAC system.


Wiring and Electrical Connections
Proper wiring ensures safe and efficient operation. Consult the wiring diagram to connect the humidifier to your HVAC system. Ensure all electrical connections are secure and tested.
Understanding the Wiring Diagram
The wiring diagram provides a visual guide for connecting the Aprilaire 600 humidifier to your HVAC system. It outlines the necessary wires, connectors, and components. Ensure to follow the color-coded wires, which indicate specific functions. The diagram also shows how to integrate the humidifier control with your furnace or air handler. Properly interpreting the wiring diagram is essential for a safe and functional installation. Always refer to the manufacturer’s instructions to avoid errors. If unsure, consult a licensed electrician to ensure compliance with safety standards and system compatibility.
Connecting the Humidifier to the Furnace
Connecting the Aprilaire 600 humidifier to your furnace involves integrating the humidifier control with your HVAC system. Mount the humidifier control in the return duct, ensuring it is wired correctly to detect furnace operation. Use the wiring diagram to identify the correct terminals for power and signal connections. Connect the humidifier’s electrical components to the furnace’s control board, ensuring compatibility with your system. Verify that the humidifier activates when the furnace runs. If unsure, consult a licensed HVAC technician to ensure proper installation and functionality. This step is critical for the humidifier to operate in sync with your heating system, providing consistent humidity levels throughout your home.
Testing the Electrical Connections
After connecting the humidifier to the furnace, test the electrical connections to ensure proper functionality. Turn off the power to the HVAC system before testing. Use a multimeter to verify continuity and voltage at key connection points. Check the wiring between the humidifier control and the furnace to confirm it is securely connected. Activate the furnace and monitor the humidifier to ensure it powers on and operates correctly. If the humidifier does not activate, review the wiring diagram and verify all connections are accurate. Consult a licensed technician if issues persist. Proper testing ensures safe and efficient operation of the humidifier, preventing potential electrical hazards and ensuring reliable performance.
Maintenance and Troubleshooting
Regular maintenance ensures optimal performance. Clean the water panel seasonally and check for mineral buildup. Troubleshoot issues like improper humidification or water leaks by inspecting the water supply and drain connections.
Regular Maintenance Requirements
Regular maintenance is crucial for the Aprilaire 600 humidifier to function effectively. The water panel should be cleaned or replaced annually, depending on usage and water quality. Additionally, inspect and clean the humidifier’s drain system to prevent blockages. Check the water supply line for leaks and ensure proper drainage. During the heating season, monitor humidity levels to avoid over-humidification. It’s also recommended to turn off the humidifier during the summer months and drain the system to prevent mold growth. Always refer to the manual for specific maintenance schedules and guidelines to maintain warranty validity and optimal performance.
Troubleshooting Common Issues
Common issues with the Aprilaire 600 humidifier often relate to power supply, water flow, and drainage. If the humidifier fails to turn on, check the circuit breaker or fuse to ensure power is supplied. Verify that the control is set correctly and that the furnace is operating, as the humidifier typically runs in conjunction with it. Water leakage may indicate improper installation of the water supply line or a clogged drain. Inspect connections and ensure the drain is clear. If low humidity levels persist, check the water panel for cleanliness and proper installation. Replace the panel if necessary. Strange noises could signal loose parts or mineral buildup, requiring cleaning or tightening. If the humidifier doesn’t turn off, examine the humidistat settings or consider replacing it. Regular maintenance and adherence to manual guidelines can prevent many of these issues. Always refer to the manual for detailed troubleshooting steps.
Resetting the Humidifier Control
Resetting the Aprilaire 600 humidifier control is a straightforward process. Begin by turning the manual control to the “OFF” position. Next, locate the reset button, typically found on the back or bottom of the control unit. Press and hold the reset button for approximately 10 seconds until the control panel lights or indicators reset. After releasing, turn the control back to the desired humidity setting. Ensure the system is powered on and properly connected to the furnace. If issues persist, check the wiring connections or refer to the manual for advanced troubleshooting. Resetting helps resolve minor operational glitches without requiring complex adjustments.

Warranty and Support Information
Aprilaire offers a comprehensive warranty for the 600 humidifier, covering parts and labor for up to five years. For support, contact their customer service or visit their official website for troubleshooting guides and installation manuals.
Understanding the Aprilaire Warranty
The Aprilaire 600 humidifier is backed by a comprehensive warranty program designed to protect your investment. The warranty typically covers parts and labor for up to five years from the date of installation. This includes defects in materials and workmanship under normal use and conditions. It’s essential to ensure the unit is installed by a qualified professional to maintain warranty validity. Additionally, regular maintenance, as outlined in the manual, must be performed to uphold the warranty terms. For specific details, refer to the official Aprilaire documentation or contact their customer support team for assistance. Proper installation and adherence to guidelines ensure optimal performance and warranty coverage.
Contacting Aprilaire Support
Contacting Aprilaire support is a straightforward process for any inquiries or assistance with the 600 humidifier. Their dedicated customer service team is available to address installation questions, troubleshooting, or warranty-related issues. You can reach them via phone, email, or through their official website; Additionally, Aprilaire provides extensive online resources, including manuals, FAQs, and installation guides, to help users resolve common issues independently. For more complex problems, visiting an authorized Aprilaire dealer or partner is recommended. Ensure to have your model number and installation details ready when seeking support for efficient assistance. Aprilaire’s commitment to customer satisfaction ensures reliable help when needed; Regular maintenance and proper installation are key to avoiding issues, but support is always accessible if challenges arise;